FreeFileSync is a multi-platform, point-and-click application that implements efficient synchronization of file collections between computers over a network. It's efficient in the sense that it scans both sides then transmits only the new, deleted, or changed files, making it suitable to be run frequently as a first-level backup process. It supports both one-way and two-way sync scenarios, a distinction to be explained below.
It has a limited degree of security, in the sense of interoperating with standard Secure Shell File Transfer Protocol (SFTP) server software among other options, providing encryption of data in transit and authentication of the client to the server, based on a password or public-private key pair negotiated between the user and server administrator. It falls short in that it fails to authenticate the server to the client, a critical step of the security protocol and a feature whose presence any user cultured in SSH or SFTP software would have quite reasonably expected to go without saying.(i) But let's set aside this knife in the back(ii) for now, on the theory that it can be fixed, or at least worked around, or otherwise lived with on the basis that there isn't presently any better alternative.
Known as FFS for short, it's the work of one Florian Bauer aka "Zenju".(iii) It came to the top of JWRD's search for backup tools bridging the Windows and Unix worlds without demanding deep investments in command-line literacy. This article will illustrate the full process of installation, configuration, and basic usage in the JWRD supported mode. The target is a beginner level audience so if anything seems unclear or not working smoothly for you, feel free to ask directly in the comments or through your preferred support channel.(iv)
Table of Contents
- Download the installer for your operating system
- Open or run the installer
- Start FFS and perform basic configuration
- Create your first SFTP sync job using temporary password
- Save job configuration in interactive mode
- Configure job-specific settings
- Complete your first sync, retrieving private key file
- Reconfigure to use private key
- Save job configuration in batch mode
1. Download the installer for your operating system
While the program's source code is public - the chief theoretical advantage of the "free" aspect - a working build procedure is not, so we'll be using the author's prebuilt binaries in keeping with the usual Windows custom.
The supported version is 11.21 and this article will be either amended or linked to updated instructions if this changes.
For stability and convenience, the files are mirrored right here on Fixpoint :
- Download for Windows (18 MB)
- Download for Mac (29 MB)
If your browser prompts for what to do with the file, choose to Save.
These were obtained from the upstream Download page and should be identical to what's found there.(v)
2. Open or run the installer
You might be able to launch it straight from the browser, but I opened it through the Downloads folder (because I like to be sure of where and what things are like that). If you receive a Security Warning prompt, choose to Run :
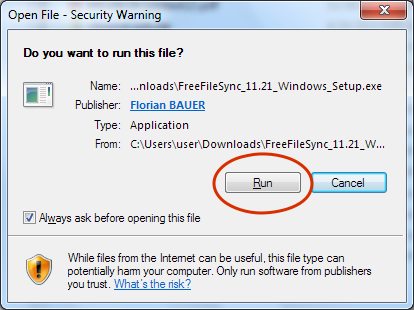
You may also receive a User Account Control prompt on whether to "allow the following program to make changes to this computer", referring to "FreeFileSync Setup". Choose Yes.
Next there's the obligatory License Agreement to accept, which is actually four separate license agreements crammed into the standard-issue impossibly small box. Since they're all open source licenses, in effect it's more of a courtesy notice than any real legal restriction, as least as far as mere use and copying is concerned. Nonetheless it must be explicitly accepted :
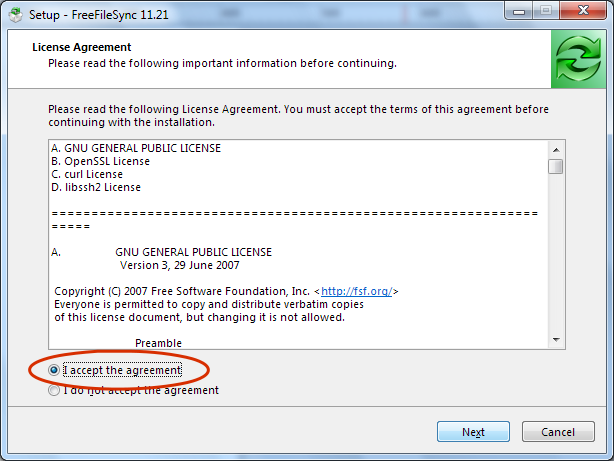
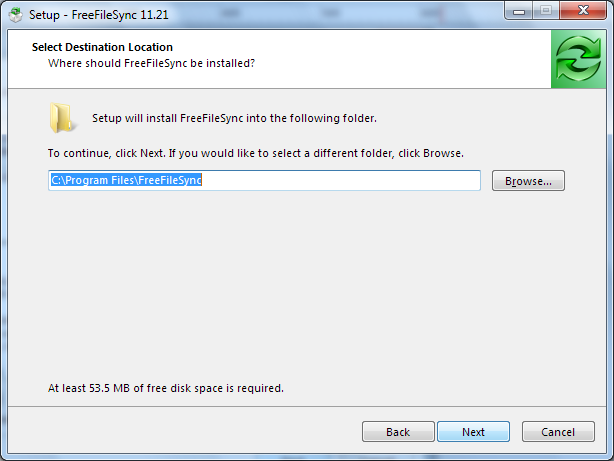
The default destination is fine :
I disabled creating the Desktop shortcut because I like a clean desktop and figure the Start menu is the more logical place to start programs from. Further, once things are set up it'll be quicker to launch by opening a saved job file, so if you really like the Desktop then those will be the more valuable things to keep in that limited space.
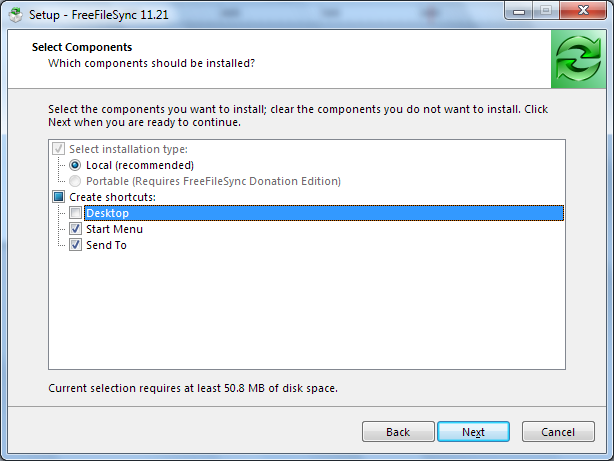
Included at no additional charge(vi) :

It'll do its thing for a few moments and then finish :
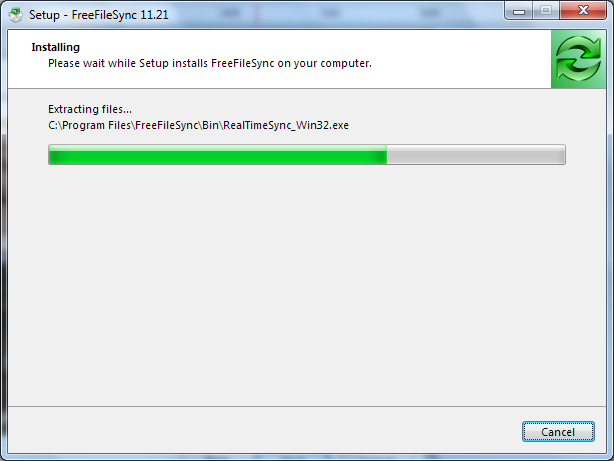
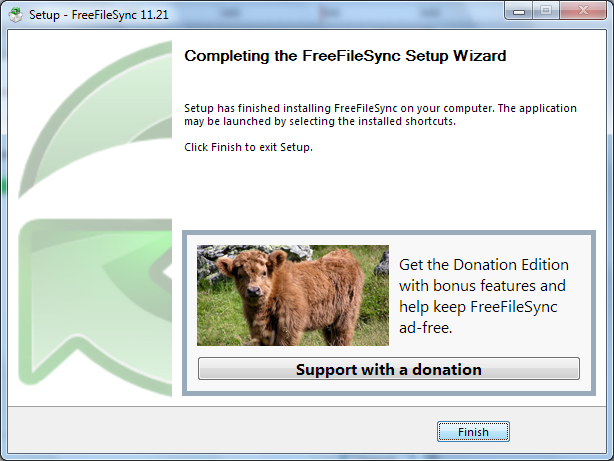
3. Start FFS and perform basic configuration
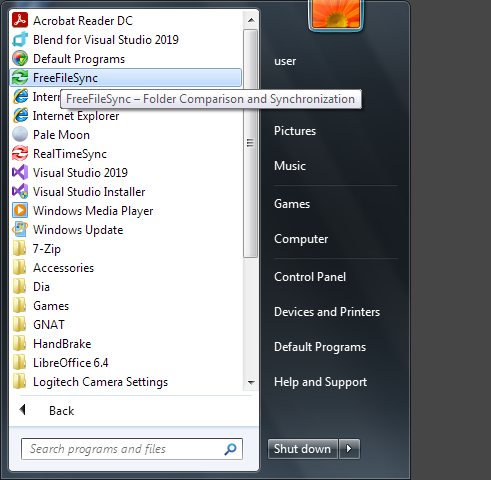
Since I allowed it to install to the Start menu, I've found it there by mousing around ; you could also just press the Windows key and start typing "freefilesync" until it comes up then hit Enter.
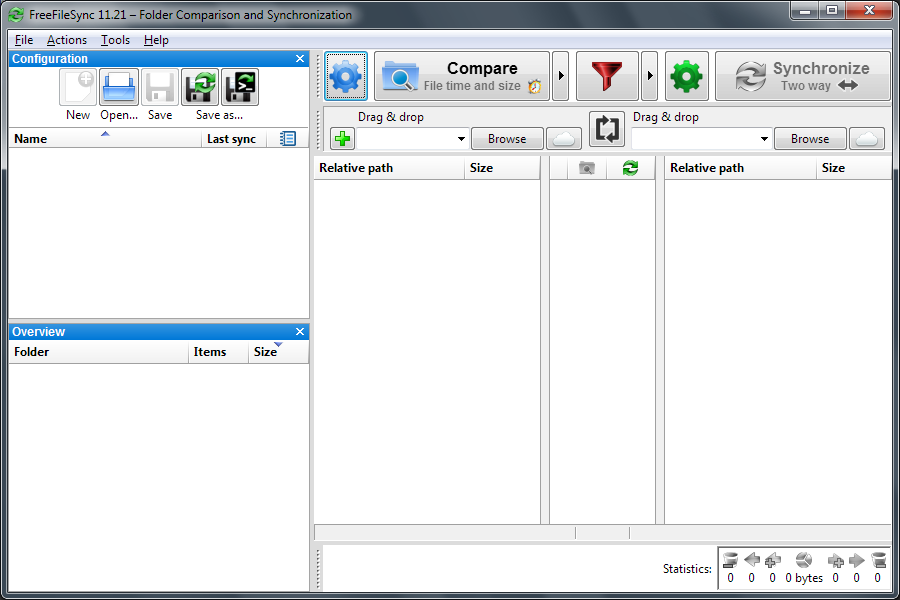
The interface is divided into panes, initially empty, with the primary being a three-column file comparison view on the right.
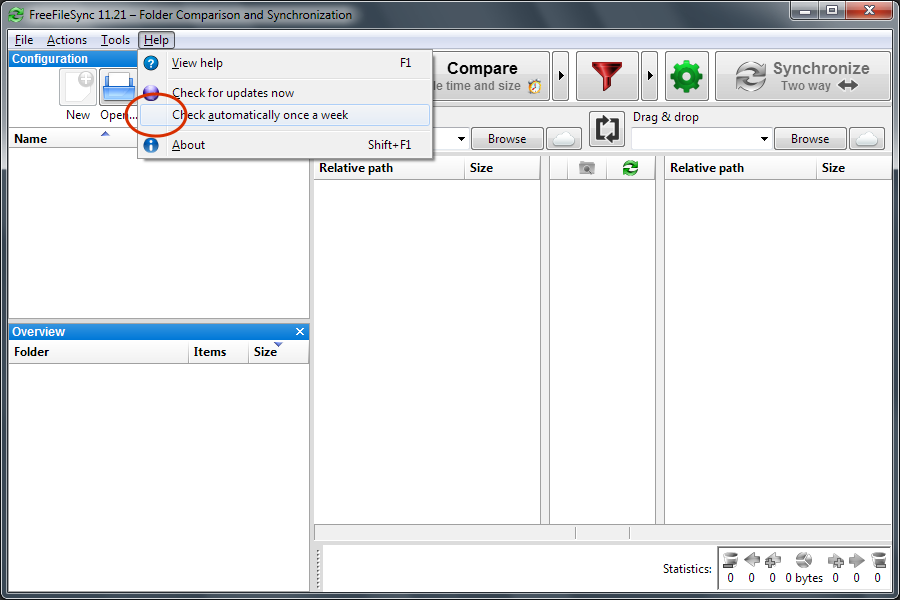
The first step is to disable automatic updates, as a matter of security policy.(vii) Under the Help menu, click "Check automatically once a week", such that it no longer shows a check mark in the space to the left of the text :
There's an Options dialog under Tools :
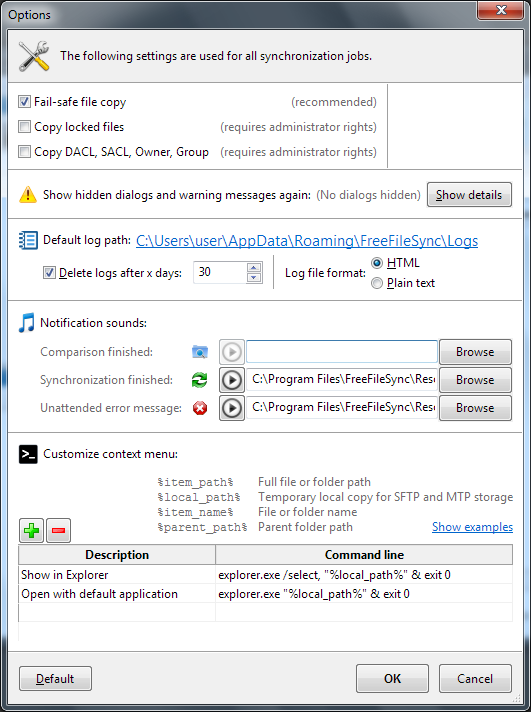
These options are global, that is, pertaining to the program as a whole rather than a specific sync job. I didn't find a need to change anything. The Default button at lower left can be used to reset everything in case you mess something up too badly.
4. Create your first SFTP sync job using temporary password
The basic operation of the program is controlled by a pair of paths indicating the filesystem trees to be compared and/or synchronized. Think of them as "Left Local, Right Remote". On the left one, click Browse and use the dialog to select the "My Documents" folder (which is sometimes displayed as just "Documents".) Then on the right one, click the button with the cloud icon ("Access online storage") :
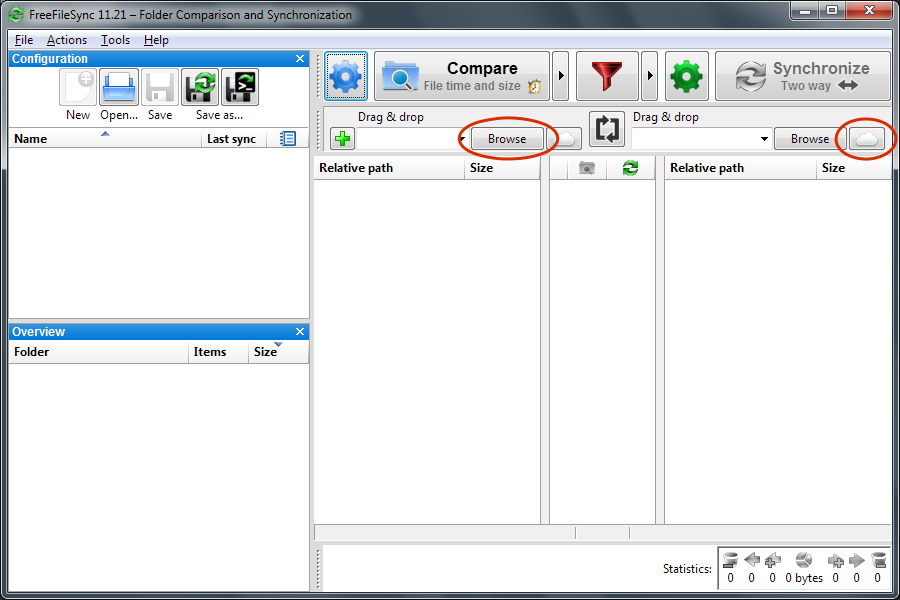
In the resulting dialog, click Connection type: SFTP, then make sure Password is selected under Authentication.
For the fields highlighted below in green (Server name, Port, User name, and Password) you will need to fill in the values provided by your server administrator. Once that's done, click Browse to select the directory on the remote server, which will double as a first test of your connection and credentials. A tree view should come up showing a top-level "upload" folder(viii) ; expand it if necessary to reveal the Documents folder within, and select that. The result should be that the "Directory on server" field shows a path of "\upload\Documents". Finally, for best performance, click "Detect server limit" to maximize SFTP channels per connection.
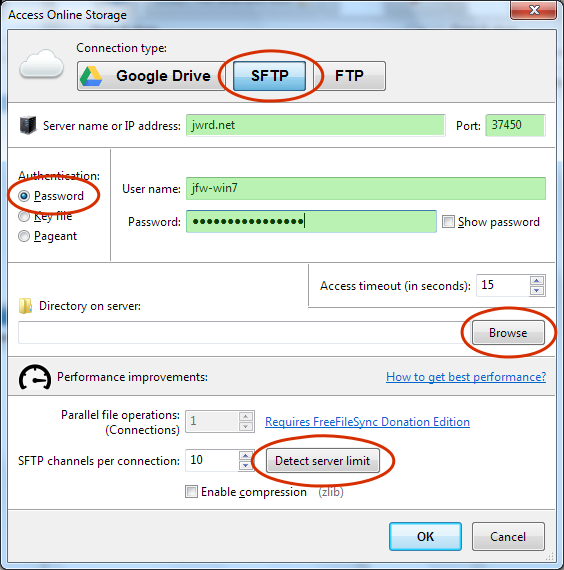
Somewhere in here you would presumably be prompted for whether to accept the server's public key fingerprint, if that functionality weren't missing. You would answer by checking whether it matches the fingerprint provided by your server administrator.
5. Save job configuration in interactive mode
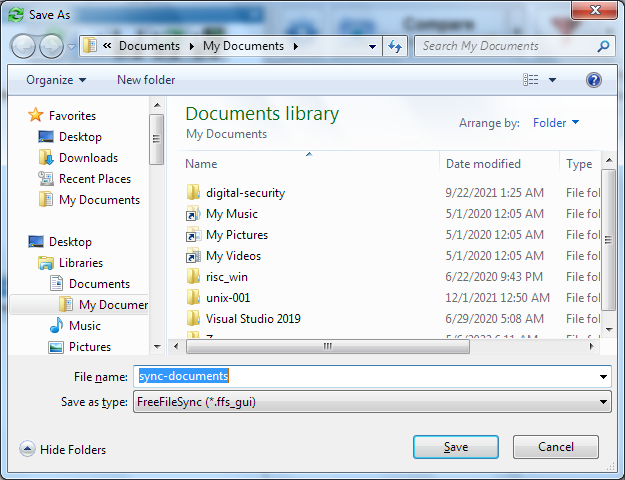
Before going any further, it's a good time to save your work. The two options for this are to produce either a ".ffs_gui" file for continuing with interactive use, or a ".ffs_batch" file for launching FFS in an unattended batch mode. We'll go with the first for now. Under the File menu of the main window, choose "Save As..." and give the file whatever name and location makes sense to you. Leaving it directly in Documents should be fine, or perhaps on the Desktop as suggested earlier.
6. Configure job-specific settings
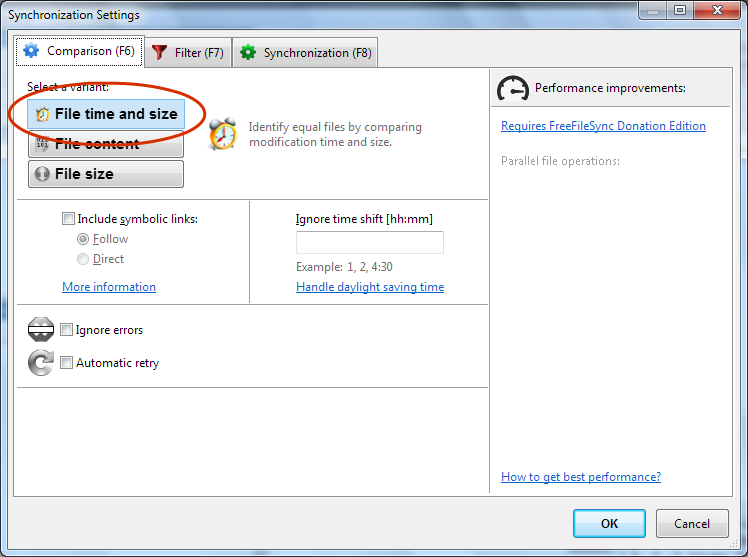
Beyond the basic path and connection parameters already established, there are still some job-specific settings to check on. The defaults should be correct, but the idea is to verify in order to make them fully explicit. Under the Actions menu, choose "Comparison settings" (equivalently, click the large blue gear icon left of "Compare"). Ensure the variant is set to "File time and size" :
Then switch to the Synchronization tab (equivalently, choose "Synchronization settings" under the Actions menu, or click the large green gear icon left of "Synchronize"). Ensure the variant is set to "Two way" :
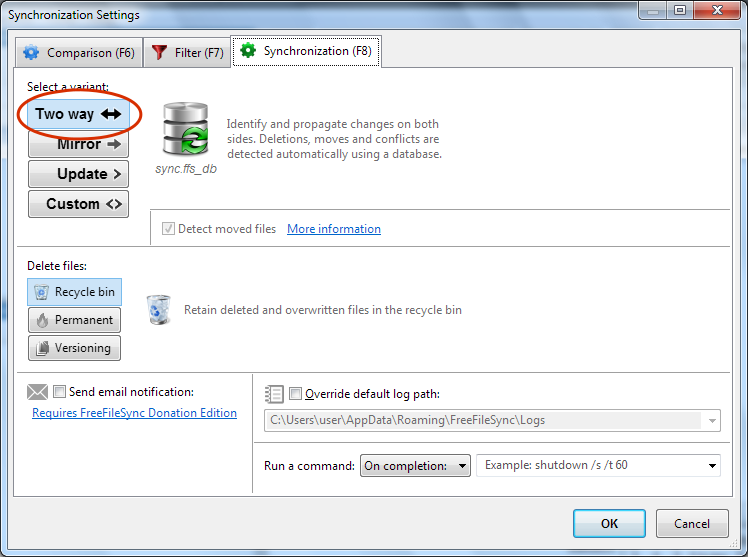
To understand what this entails, consider the case where a file exists on the right side but not the left. Does this mean that it was newly created on the remote server and needs be copied to the local machine? Or that it was deleted from the local machine such that it should now be deleted on the remote end too? In two-way mode FFS will keep track of what it saw before so as to figure out on which end the change was made and propagate it to the other. Whereas in one-way mode, the left side is treated as the master and the right side is always updated to match it.
Thus, in scenarios where it fits, one-way mode is simpler, safer, and can be used for fully unattended "set and forget" backups. But it's of no help for sharing a file collection between multiple machines where changes could be made on any one of them.
In two-way mode on the other hand, conflicts are possible. Suppose you sync up and then inadvertently edit the same file on different machines, making different changes on each. How is the poor beast (i.e. the program) to guess which version to keep and which to overwrite ? It cannot - at least not in any reliable way - so it will require you to resolve the conflict by telling it which direction to send the file. And if you actually wanted to keep both changes, you're out of luck and will have to pick one version, sacrificing the changes from the other then manually redoing them on top of the first.(ix)
The easiest way to avoid conflicts is to sync often, say at the end of each work session, which of course will also help protect your work from loss.
After applying the settings, save changes to the job file if needed (File -> Save or the floppy disk icon).
7. Complete your first sync, retrieving private key file
Now that the initial connection has been established, we're going to ratchet up the security level. So far, anyone on the Internet who can guess or snoop the password you were given, either now or in the future, gets read-write access to all your stuff. O brave new Cloud, which has such leakage in't!
Instead, let's give your machine its very own cryptographic private key file by which it will identify to the server. Unfortunately FFS doesn't provide a way to create such keys. We (JWRD) thought about piling on yet more software to install, but for simplicity we've decided instead to generate the key on the server side and enlist FFS itself to securely retrieve it.
From the main FFS window, click the big blue Compare button. It will connect to the server, scan both sides, and prepare the list of changes. Since this is the first run, it should identify everything under Documents as new files on the left :
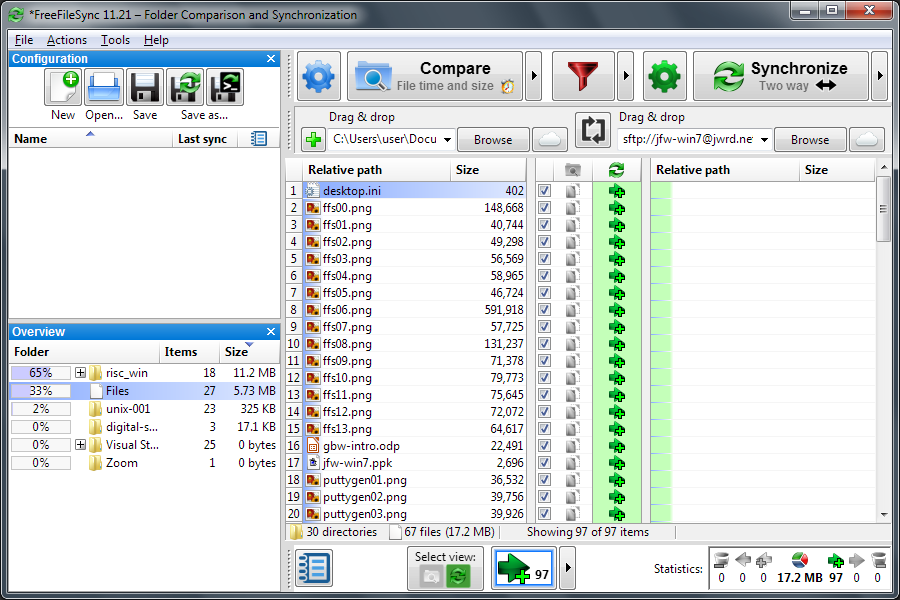
You might also spot your new private key file on the right, named following the pattern "id_rsa.USERNAME.pem" (which should have minimal chances of colliding with the name of any existing file you might have).
The narrow center column of the comparison view shows the status and proposed action for each file. Various parts of that column are clickable to change things ; mouse over them to show tooltips with the details. The Overview pane at bottom left shows a handy synopsis of the folders to be transferred along with their cumulative sizes.
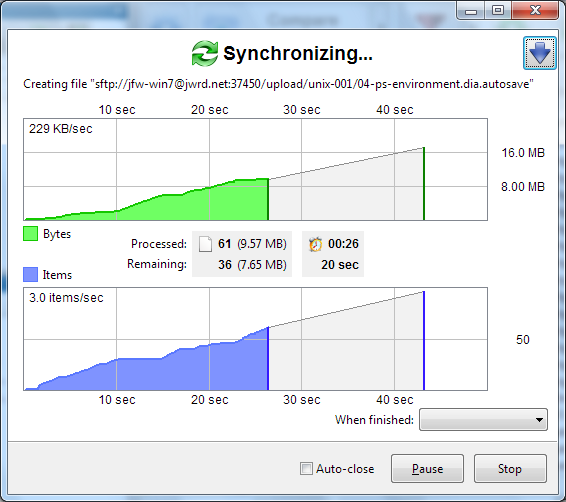
Once satisfied, click the big green Synchronize button. An impressive progress dialog pops up, featuring graphs of cumulative bytes and files transferred by time, with current rates and projected time to finish :
8. Reconfigure to use private key
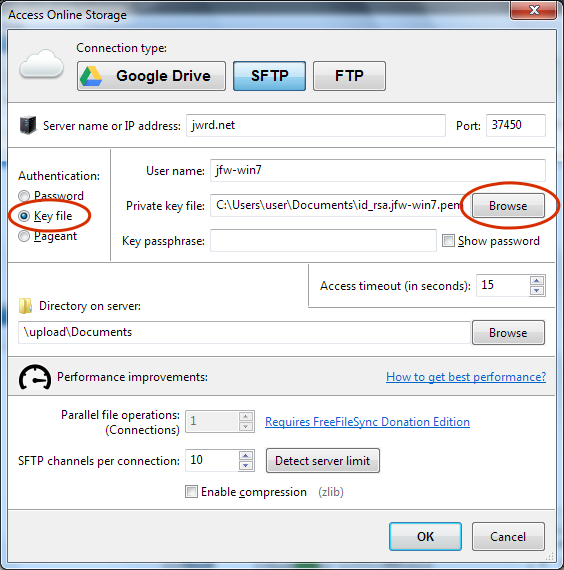
Assuming all went well, it's time to apply that private key file. Click the cloud button by the right-hand path again to edit connection settings. Change Authentication to "Key file", then Browse to select that "id_rsa.USERNAME.pem" file mentioned earlier, like so :
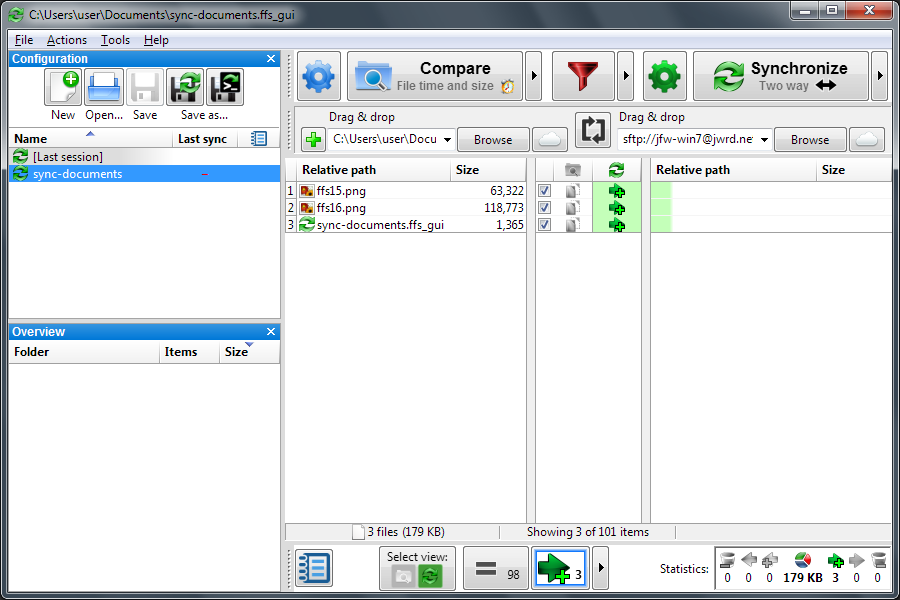
Save the job and do another Compare, then Synchronize. You should get a much shorter list this time, perhaps just the changed job file itself :
Be sure to let your server administrator know it's all working and the temporary password can be disabled.
When testing at one point with changed or deleted files, I got a warning about the remote server not supporting a recycle bin :

I figure that one's safe to dismiss and not show again, based on a view that the risks of accidental file deletion or overwrite are better mitigated in other ways, e.g. recovering from local trash/recycles, regular backups on the server end, or sufficient pain that it doesn't happen again... But then, I'm a CLI guy who's accustomed to working without such safety nets, and FFS does provide a number of alternatives for keeping old file versions around if this is of particular concern.
9. Save job configuration in batch mode
Finally let's try out that batch mode so the routine part of the process is as streamlined and painless as it can be. The starting point is to have an existing interactive job configuration loaded (though I suppose it could be done without saving one first). Under the File menu, this time select "Save as batch job..." and it will prompt you with some further batch-specific choices :
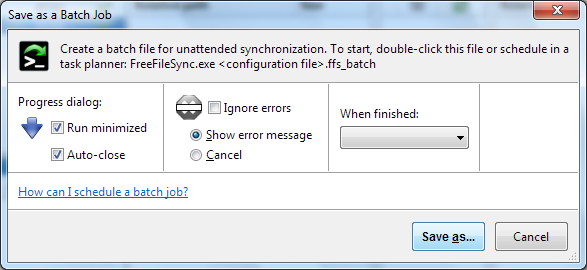
To push it all the way towards minimal interaction in the normal case, I checked "Run minimized" and "Auto-close". Next you'll get the usual save dialog, this time with file type of ".ffs_batch".
Exit the program entirely, then find the saved batch job file. Open it and FFS will start (e.g. as a green circling-arrows icon in the system tray) and proceed to the comparing and synchronizing on its own.
For an example of conflict handling in batch mode, I tried modifying the same file on both ends, and this is what popped up :
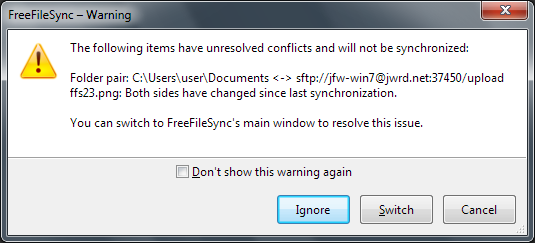
Pretty simple, I'd say. Ignoring would do in a pinch if you're in a hurry to run off, in which case the conflict will simply come back up on the next round. I definitely would NOT use the checkbox to hide that warning entirely! (Hidden warnings can be re-enabled through the global Options.)
That about covers the basics. I'd say I found FFS to be quite a comprehensive program for what it is, packing a number of more advanced features for when the need arises yet doing a reasonable job of keeping the easy things easy. I found it quite helpful to my workflow already in fishing the growing collection of screenshots out of my low-trust Windows machine and into my usual Linux-based blogging environment.
Congratulations, you have earned the Level 1 File Slinging Merit Badge. (Sash and sewing supplies sold separately.)
- In further pointing out of the obvious, Windows users are implicitly entrusting their data at all times to Microsoft, Intel, and an untold number of other vendors who have repeatedly proven untrustworthy for the purpose. The best we can do in this environment is to take steps toward something better while not making things unnecessarily worse, as is routinely done in modern practice for instance by introducing "cloud storage providers" and "certificate authorities". [^]
- Because that's exactly what it is ; however "unwittingly" and "with best of intentions" it all no doubt was, the blood still runs out just the same. [^]
- Who I'll guess is either too reclusive or too German to have been aware of the abbreviation's other meaning. [^]
- Actively-used computers are like snowflakes, with no two ever quite the same, so your mileage may vary and in particular, newer versions of Windows or any kind of Mac will look a bit different from my screenshots here. The hope is that the core of it will be similar enough to translate, and if things prove otherwise then we can delve. [^]
- Old versions are found instead on the Release Archive page ; a hat tip for providing at least this, albeit encumbered by various cloudflares and mediafires, and falling short of proper version control which would be far more helpful, at minimum to figure out what's actually meant by the high-level change listings. [^]
- I gather he used to show ads in this space, but gave up on that scheme when it kept triggering anti-malware bots. [^]
- This may go against the usual canned advice you've heard on such topics. The reason is that, while we've chosen to use this particular software artifact as it is, we don't know the developer and do not give him carte blanche to access and make changes to the system, which is exactly what automatic or otherwise blind updates even mean. If a given change is so important, let the case be made to me for why it's justified, because change certainly isn't free. [^]
- This represents a portion of the server's filesystem to which you've been granted access - technically, a "chroot". [^]
- The worst is when you have multiple people working concurrently on the same shared file set. At that point you've outgrown simple file-level tools like this and might be better served by a proper networked database or version control system. [^]
[...] infrastructure for their data storage and communication needs. For starters this includes internal file sharing and backups, email, public website, and customer-facing and administrative database interface [...]
Pingback by The Dovecot reports: how we came to forking a major email server « Fixpoint — 2023-04-06 @ 23:59